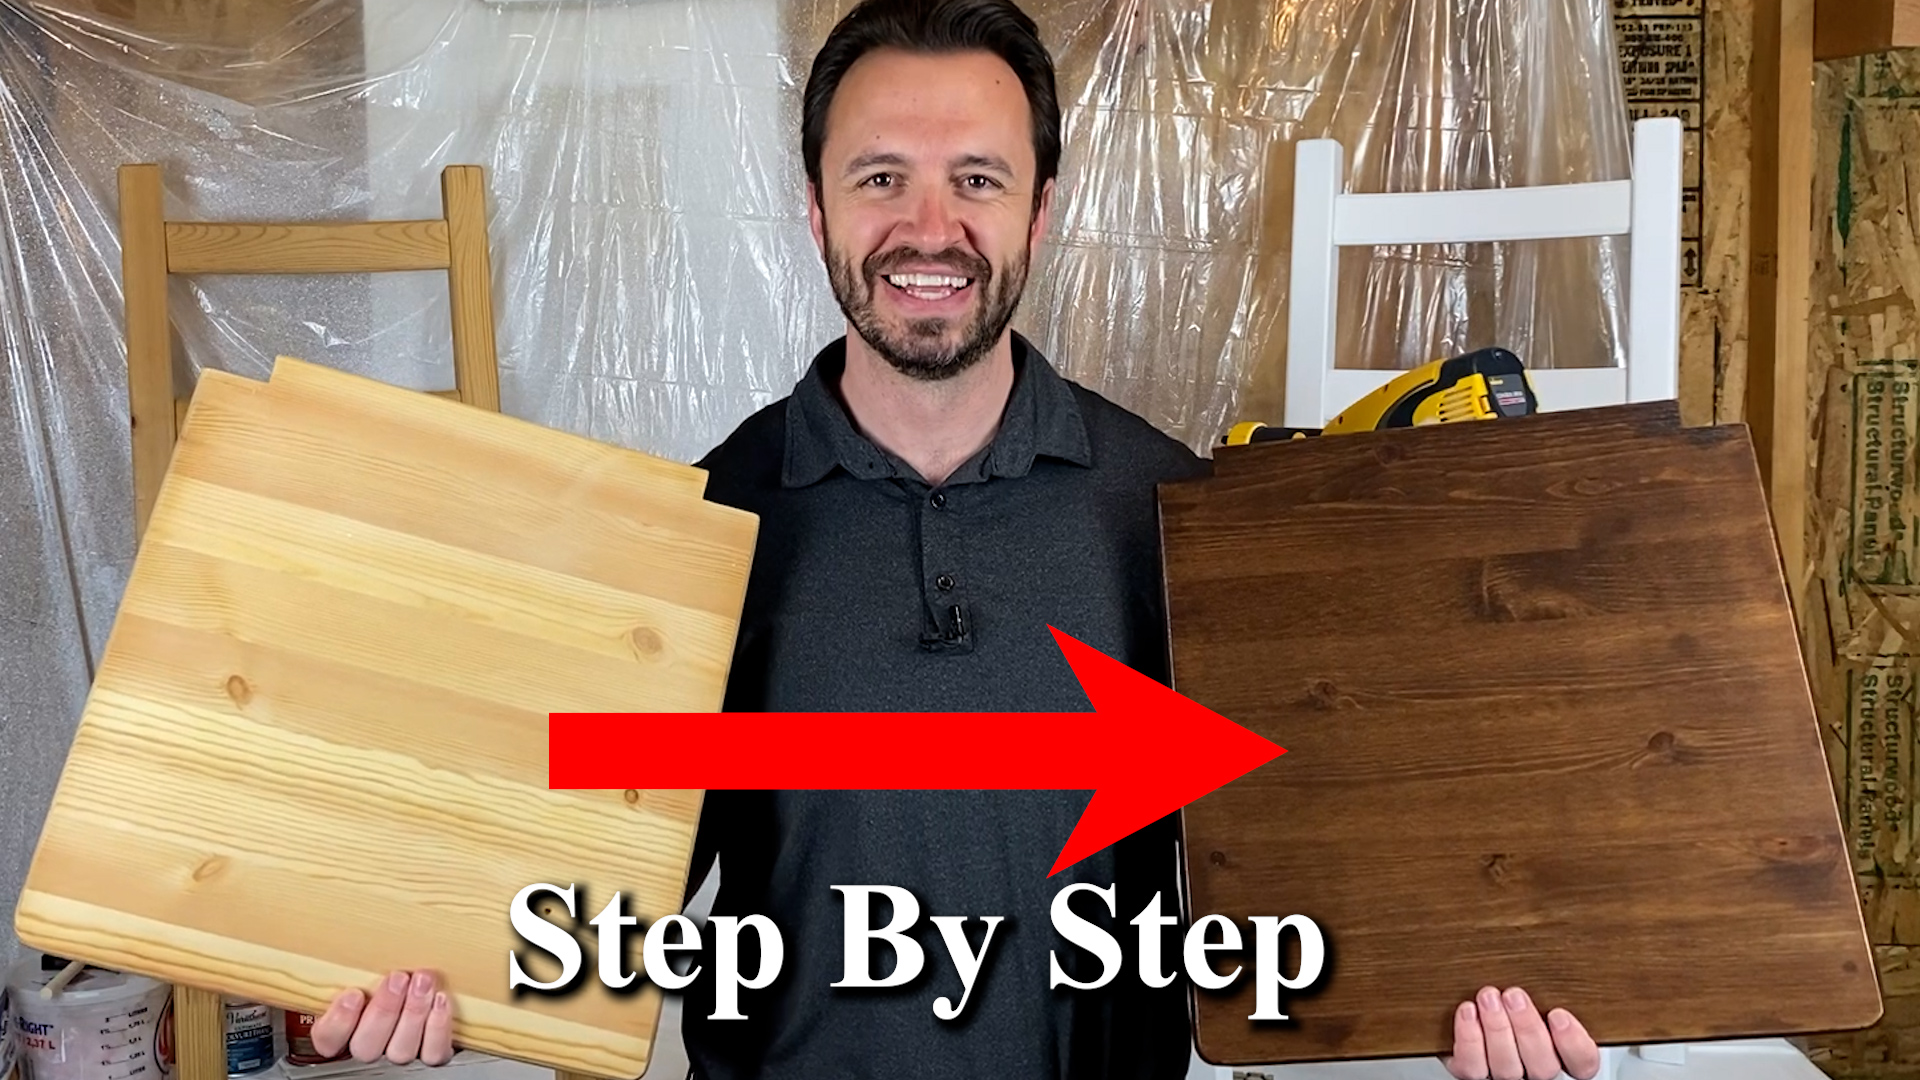
Today, I’ll guide you through the process of staining wood, using an unfinished chair as our canvas. While the full transformation of this chair will be featured on the channel, I’ll focus on the staining process in this tutorial. This method is versatile and applicable to various wood types, making it perfect for any DIY wood staining project.
Video Tutorial:
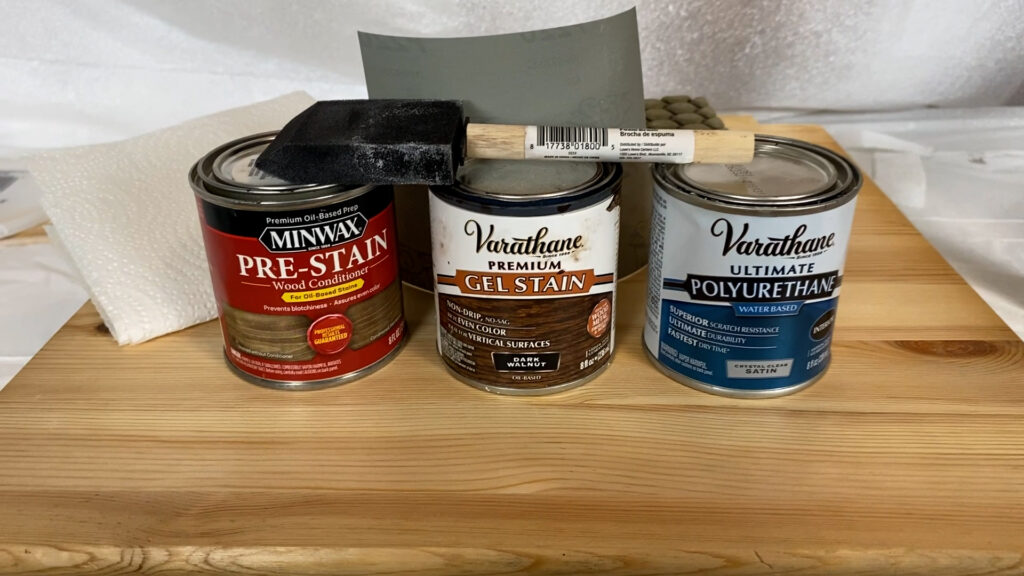
Materials Needed:
- Pre-stain wood conditioner
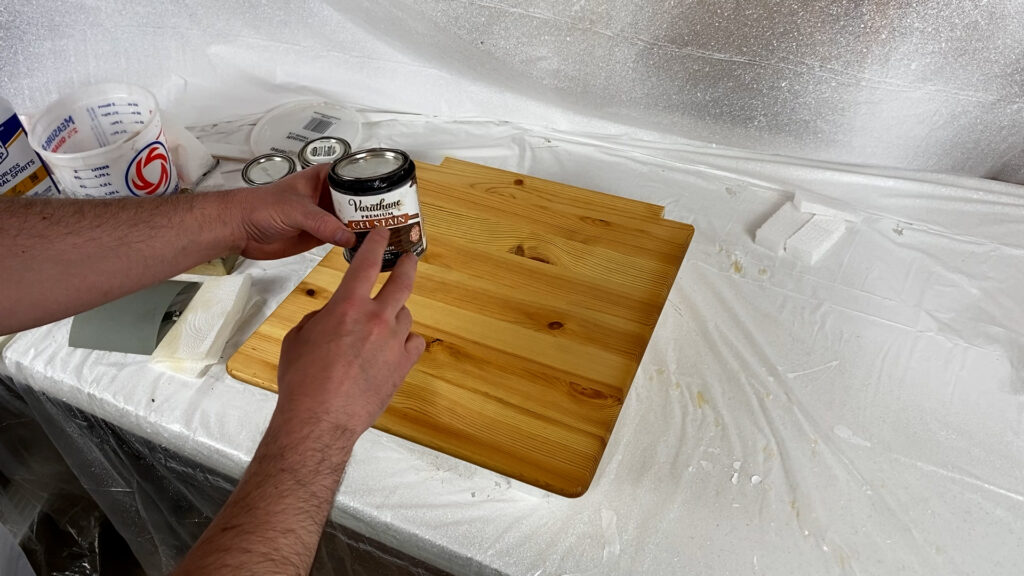
- Gel stain (Dark Walnut for today’s project)
- Polyurethane sealer
- Brush for application
- Paper towels for cleanup and stain application
- Sandpaper for smoothing (if required)
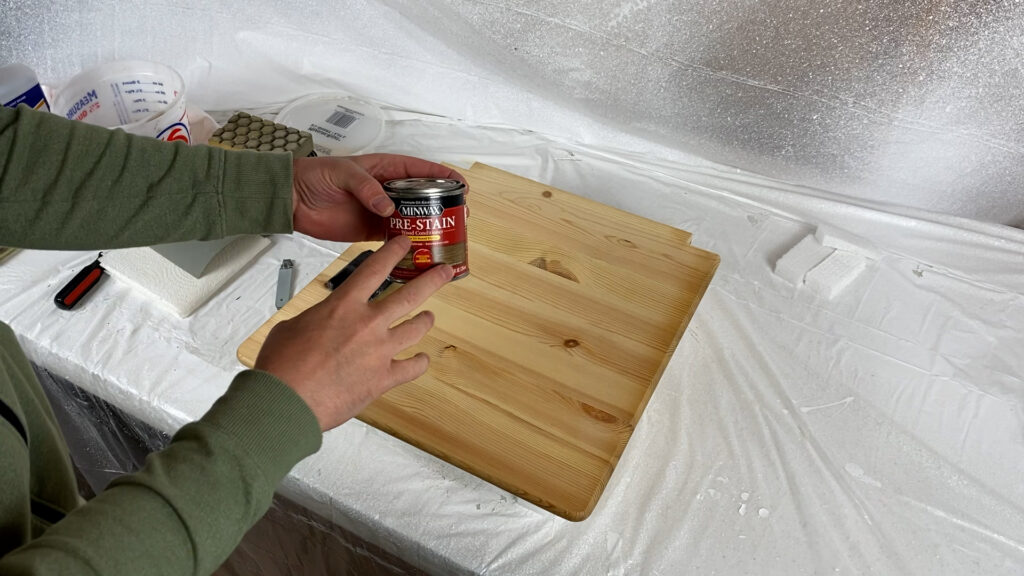
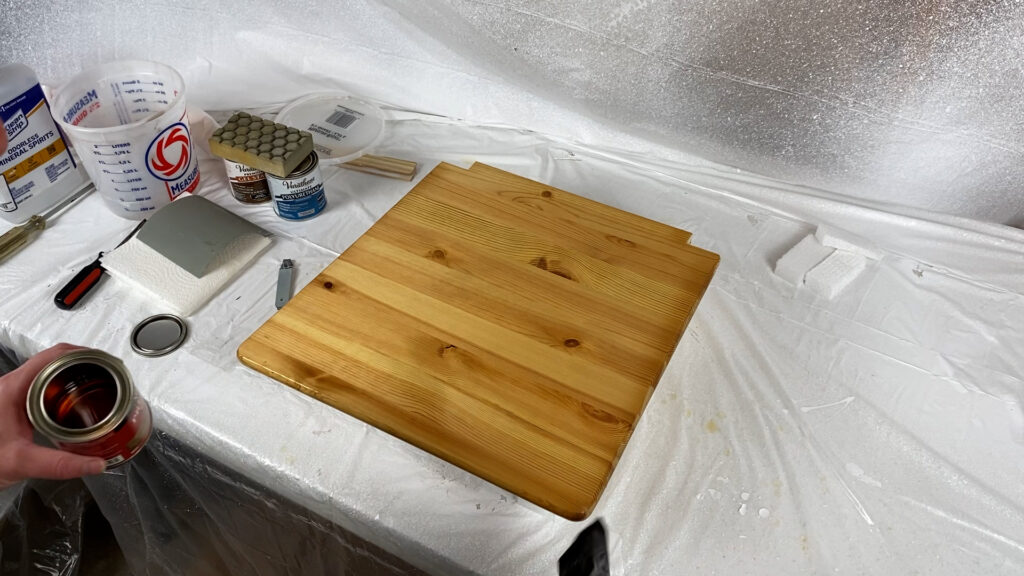
Step 1: Preparing the Wood
Before applying the stain, it’s crucial to prep the wood with a pre-stain wood conditioner. This step ensures an even absorption of the stain and prevents blotchiness. Simply apply the conditioner evenly across the wood surface using a brush.
Allow the conditioner to soak in for about 15 minutes, then wipe off any excess with a paper towel.

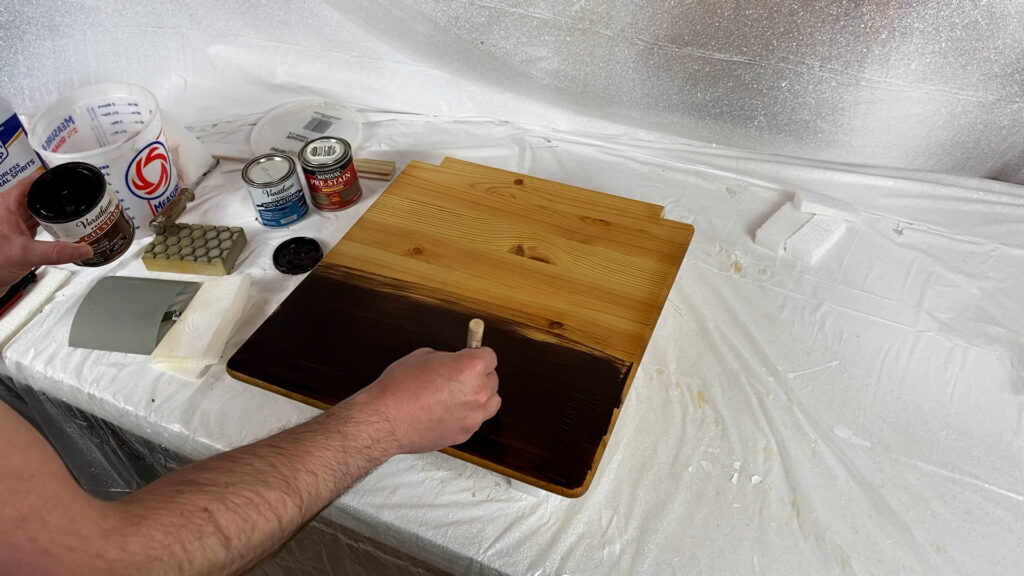
Step 2: Applying the Stain
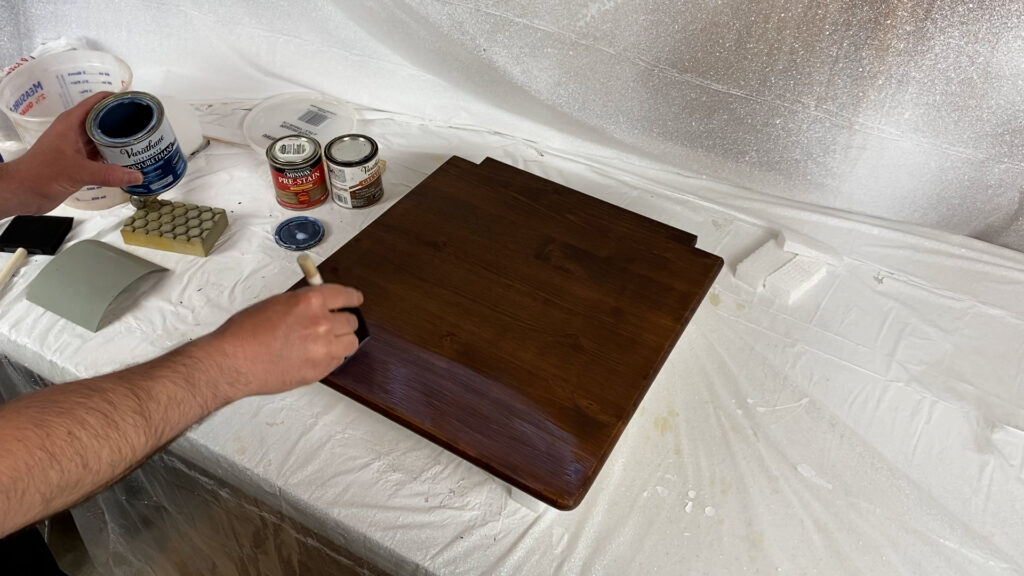
Now, it’s time to apply the gel stain. Start by applying the stain along the edges and surfaces of the wood, working with the grain for even coverage. Dark Walnut is our stain of choice for this project, but feel free to choose a color that suits your preference.
After applying the stain, use a paper towel to wipe off any excess and ensure a smooth, uniform finish.
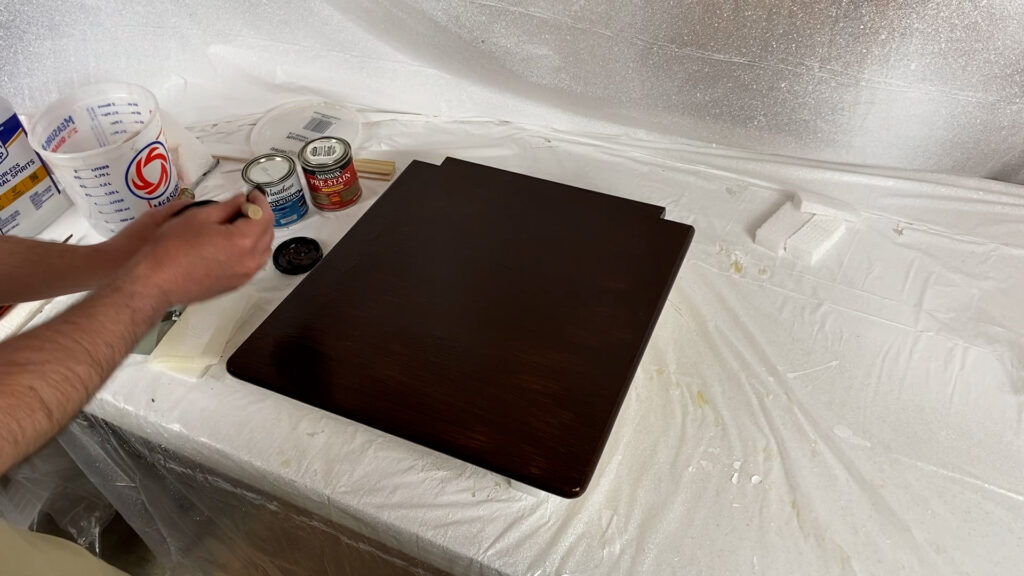

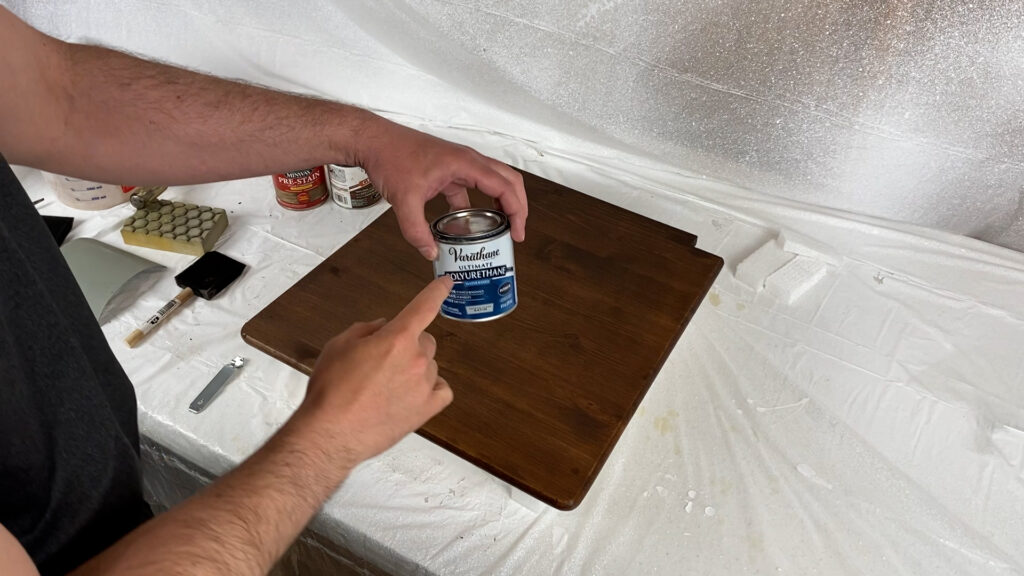
Step 3: Sealing the Wood
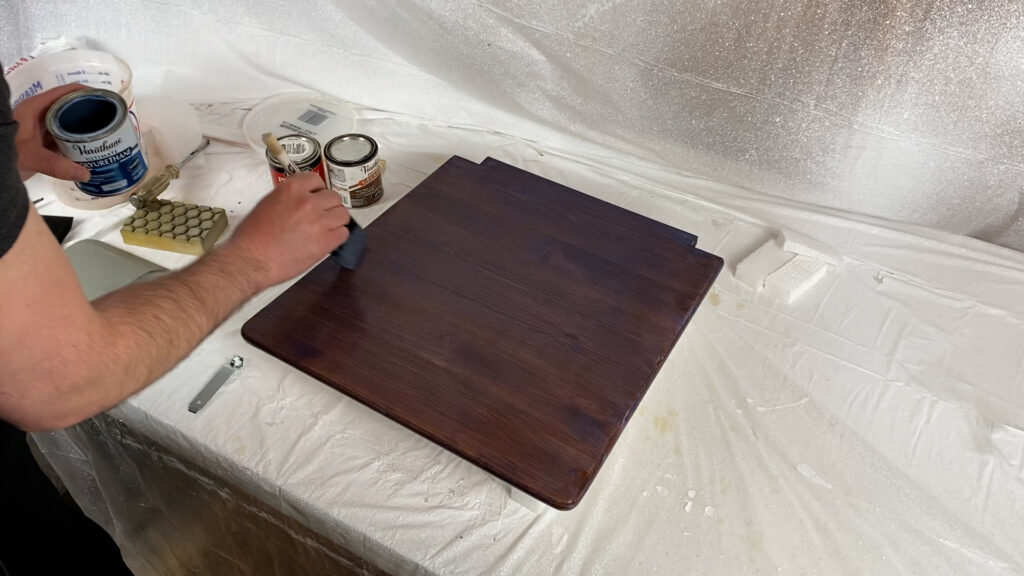
Once the stain has dried for 24 hours, it’s time to seal the wood with polyurethane. Apply the sealer using the same brush, working with the grain for consistent coverage. The polyurethane will provide protection and durability to your stained wood surface.
After applying the first coat, allow it to dry for an hour or two before assessing if additional coats are needed. Sand out any rough spots or bubbles with fine-grit sandpaper before applying subsequent coats for a smooth finish.
Step 4: Final Touches
Once the final coat of sealer has dried, your stained wood project is complete! Enjoy the rich color and enhanced beauty of your transformed piece of furniture. Remember to properly clean your tools and hands after using oil-based stains, and consider wearing gloves for easier cleanup.
Final Result
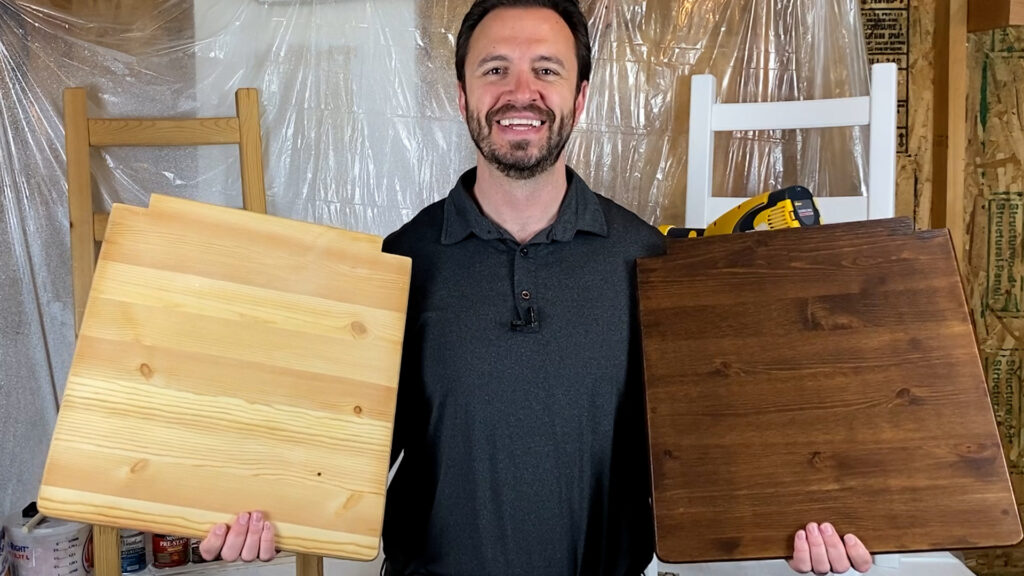
And there you have it! A detailed guide on how to stain wood, from preparation to finishing touches. Feel free to customize your staining project with different colors and finishes to match your style and preferences. If you found this tutorial helpful, don’t forget to like and subscribe for more DIY content. Happy staining!
For more helpful tutorials check out this next: How to Stain a wood table from IKEA