Greetings, DIY enthusiasts! Today, I’m excited to walk you through the ins and outs of using the Wagner paint sprayer. Whether you’re a seasoned pro or a beginner, I’ll cover everything you need to know to kick off and complete your first project seamlessly. Be sure to check out the included video tutorial of how to use the Wagner Paint Sprayer.
Supplies for Today’s Project
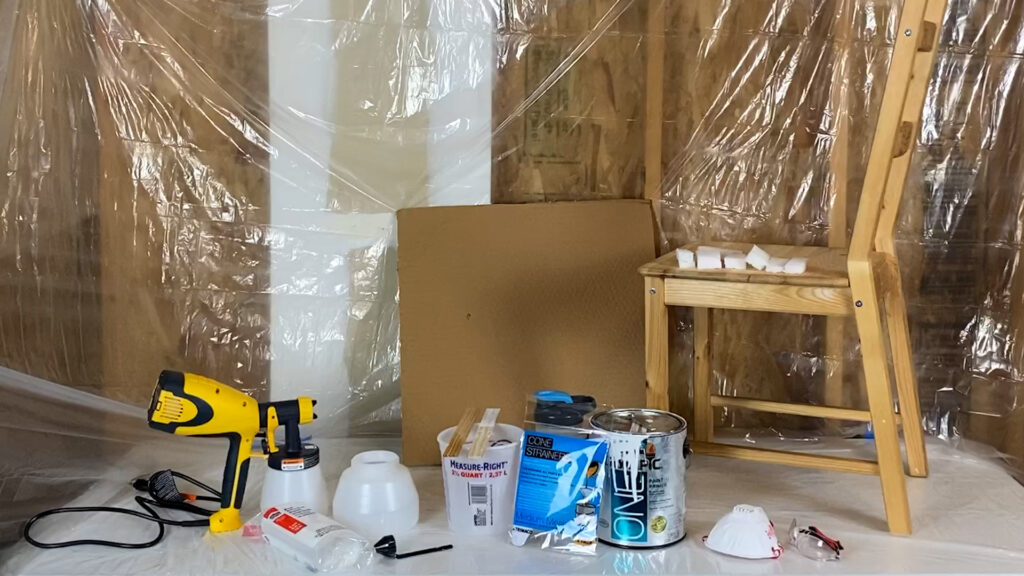
Let’s start by rounding up our essentials for the day’s project. Here’s what you’ll need:
- Wagner paint sprayer
- Drop cloth for a tidy workspace
- Mixing bucket for thinning materials
- Stir sticks for efficient mixing
- Cone strainer or filter to prevent clogs
- Water for thinning the paint
- Paint of your choice (today’s pick: Olympic Paint Plus Primer in white)
- Safety gear: N95 mask respirator and eye goggles
- Wooden chair (our project star from Ikea)
- Foam blocks for elevation
- Cardboard for spray testing

Getting Acquainted with the Wagner Paint Sprayer
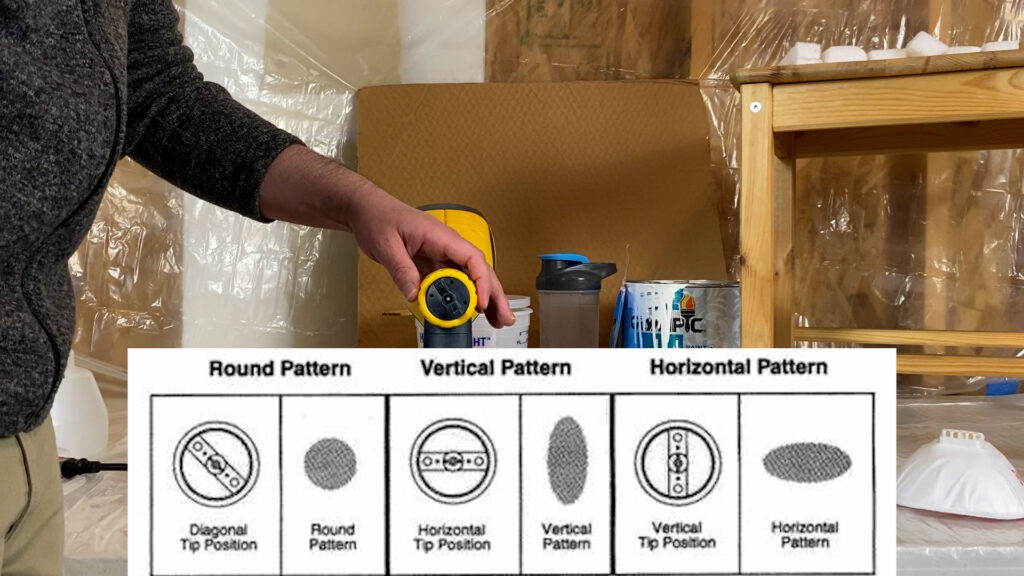
Before diving into our project, let’s familiarize ourselves with the Wagner paint sprayer. If you’re assembling it for the first time, there’s a little switch to pull down for easy rotation. The nozzle, air cap, and nut are crucial components for adjusting the spray pattern. You can set it for horizontal, vertical, or circular patterns depending on your project requirements.
Thinning Your Paint
Thinning your paint correctly is key to achieving optimal results. The Wagner paint sprayer comes with a viscosity cup. Aim for a run-out time of about 25 to 40 seconds; the user manual provides a helpful chart based on the material you’re working with. Remember the one-to-three ratio rule for thinning: one part thinner to three parts material is a good starting point.
For more information be sure to check out this video on how to thin paint for the Wagner Sprayer:
Setting Up and Testing
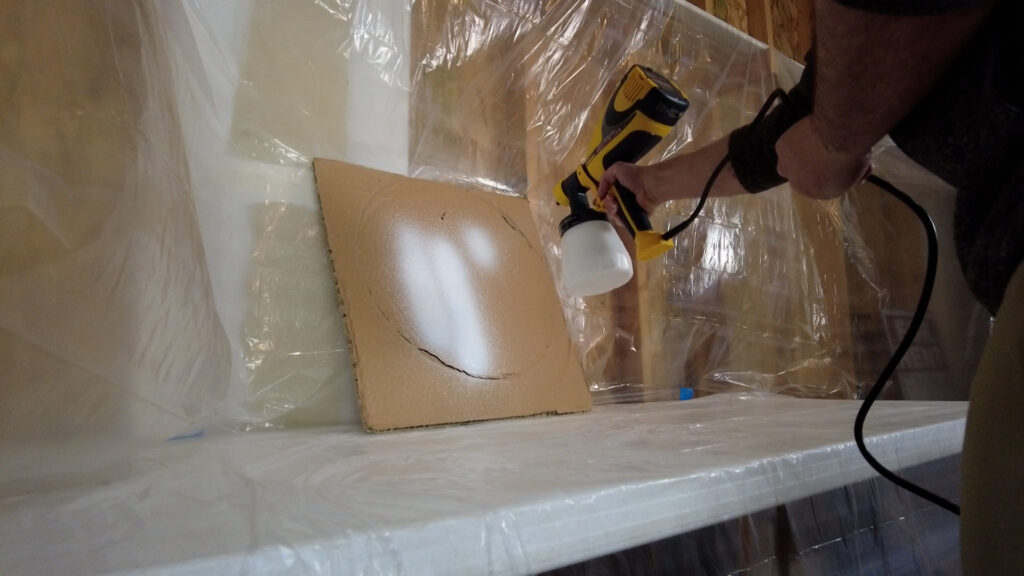
Once your paint is properly mixed, set up the filter and container, ensuring there’s no debris. Attach the container to the gun, and you’re ready to test your spray patterns. Experiment with horizontal, vertical, and circular settings to find the ideal one for your project.


Painting the Wooden Chair
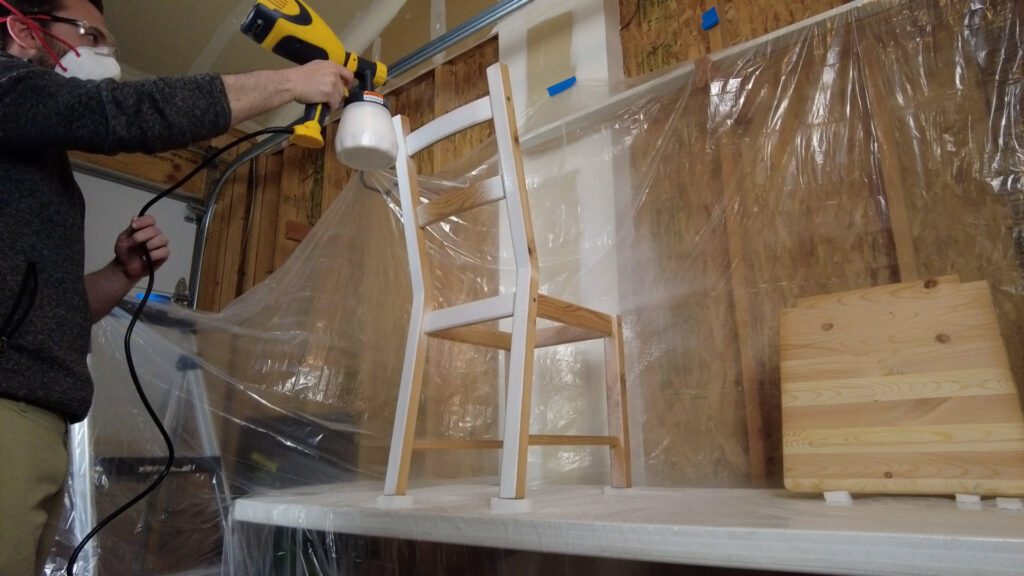
With everything set up, let’s dive into the project – painting the wooden chair. Elevate the chair using foam blocks, and use a stir stick to prevent sticking to plastic. Apply the first coat evenly, allowing it to dry before deciding if additional coats are needed.

Properly Cleaning the Sprayer
After completing your project, it’s crucial to clean the sprayer for easy storage. Release the nozzle, take apart the components, and rinse them with warm water. Run soapy water through the gun to ensure a thorough cleaning.
Video Tutorial: How to use the Wagner paint sprayer
Final Thoughts
And there you have it! You’re now equipped with the knowledge to confidently use the sprayer for your DIY projects. For more helpful tips and trick be sure to check out other post on the website. Maybe you need to remove some paint before hand, in that case check out this post about how to remove paint using Citristrip.
If you enjoy DIY content, don’t forget to like, subscribe, and explore more videos on my channel. I’m Drew Smith, and I’ll catch you in the next one!
