
Does Sanding Laminate Before Painting Make a Difference? A DIY Experiment
Are you planning to breathe new life into your laminate surfaces by giving them a fresh coat of paint? Before you grab that paint can, here’s a DIY experiment that might change the way you approach your project.
The Experiment: Sanding vs. Not Sanding Laminate
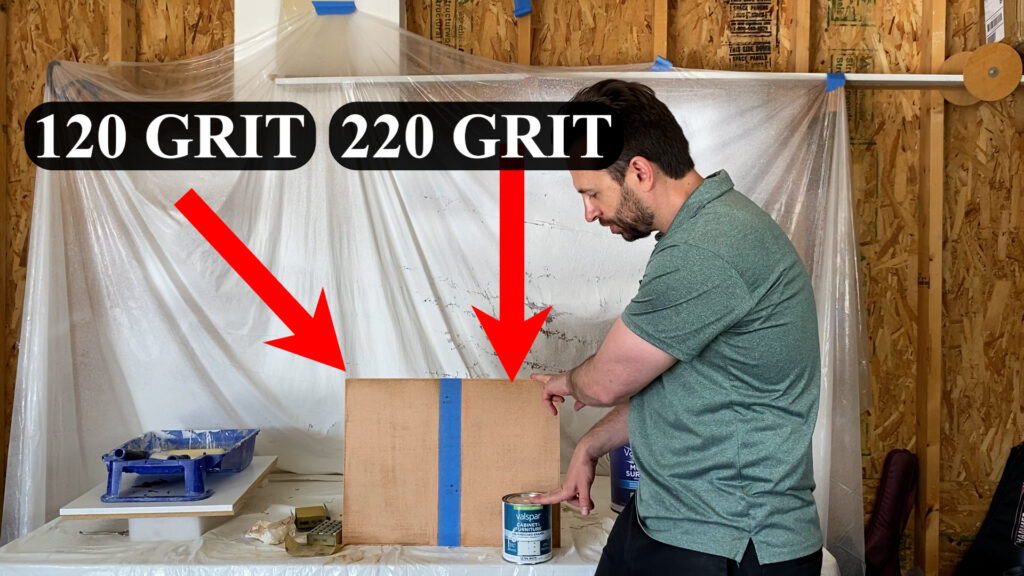
In this project, I decided to test whether sanding laminate surfaces before painting truly makes a difference. I used 120 grit sandpaper on one side and 220 grit on the other. The top got 120 grit, while the bottom received a smoother touch with 220 grit.
Previous Tests: Primer vs. No Primer
Before diving into sanding, I conducted prior tests on two similar laminate boards. One was primed, and the other was painted directly using cabinet and furniture paint. The results were surprisingly similar, with minimal differences in texture and durability. Both paints scratched off easily and showed that just using a primer coat had no positive impact.
The Sanding Process:
After sanding both sides, I proceeded to paint the laminate with cabinet and furniture paint. Each side received three coats, and I allowed four weeks for ample drying time.
The Scratch Test: Results Revealed
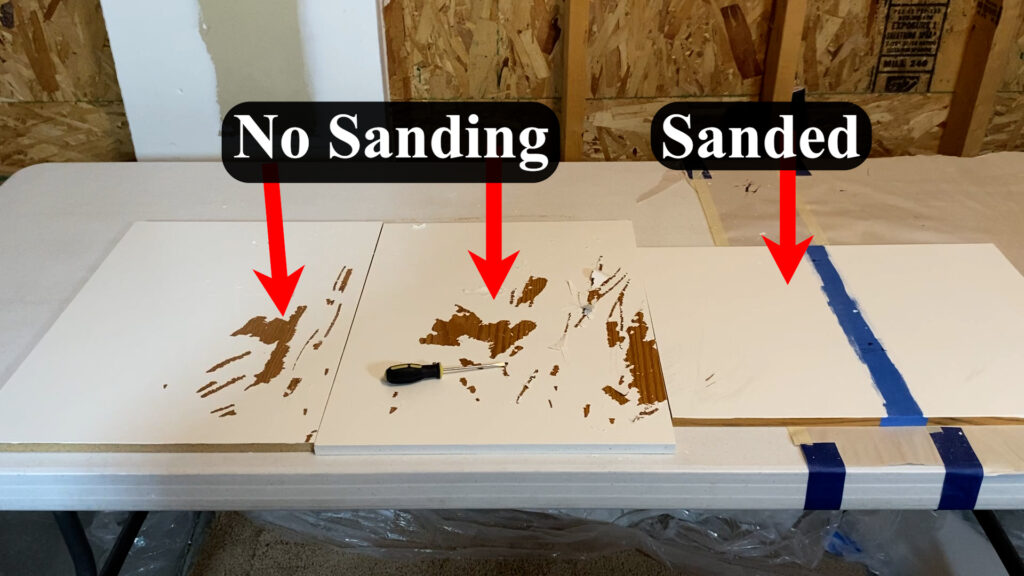
Now, the real test – the scratch test. I used various tools, including my thumbnail and a screwdriver, to evaluate the durability of the painted laminate.
- No Sanding : The paint scratched off easily with my thumbnail and a screwdriver, revealing vulnerability.
- Sanded (120 and 220 Grit): Surprisingly, the paint showed resilience. While scratches were visible, the paint adhered better and didn’t flake off like the un-sanded side.
Sanding Makes a Significant Difference
In conclusion, the experiment provided clear evidence that sanding laminate surfaces before painting can significantly enhance the paint’s adhesion and overall durability. The sanded laminate exhibited superior resistance to scratches, making it a worthwhile step in your DIY painting project.
Final Thoughts: DIY Tips for Success
- Sanding Matters: Don’t skip the sanding step. It provides a textured surface that allows the paint to grip and adhere better.
- Choose the Right Grit: Depending on your project, choose the appropriate grit for sanding. In this case, 220 grit proved effective for a smoother finish.
- Patience Pays Off: Allow ample drying time between coats and after the final paint application. This ensures a hardened and durable finish.
Ready to Transform Your Laminate?
If you’re gearing up for a laminate painting project, consider the insights from this experiment. Sanding might add a bit of extra effort, but the long-lasting, professional-looking results will undoubtedly make it worthwhile.
Check out this post about panting laminate kitchen cabinets.
Hopefully you found this helpful and learned more about why you should paint laminate before sanding. consider liking and subscribing for more DIY tips. I’m Drew Smith, and until the next project – happy painting!